
Shortbread Filled Star Cookies

Shortbread has its pluses and minuses. On the positive side, it’s delicate, buttery, melt-in-your-mouth deliciousness. It’s also egg-free, which is unusual for cookies - meaning even the raw dough is safe for my daughter who has a raw egg allergy. This is a game changer for a little girl helping her mom bake ALL the cookies, because every kid should be able to lick the spatula, scrape the bowl, and eat the dough.
On the negative side, it’s delicate and prone to breakage in both the dough and cooked forms. Please be forewarned - if dealing with a bunch of broken cookies is going to drive you nuts, making shortbread is not for you. If, however, you can be patient and talk sweetly to your shortbread, there are delicious rewards on the other side!
I’ve never made these before this year, but I knew a shortbread was going to be on the menu to give my daughter the full cookie baking experience, so I decided to make them fun and add in two of her favorite things - raspberries and peaches. What can I say? The girl loves her fruits.

Step 1: Gather Your Ingredients
There’s not a lot to a basic shortbread - flour, sugar, salt, and a hefty amount of butter. Don’t let that short ingredient list fool you, though; shortbread is an elegant addition to any cookie tray.
Making shortbread is kind of like making a pie dough in that the butter needs to be somewhat cut-in. It’s not as dramatic as cutting butter into a pie crust, but shortbread requires cold butter. No softening needed - just take it straight from the fridge and slice it into 1/2” thick pieces.
Step 2: Combine The Wet Ingredients
I’m not going to get all fancy here because mixing these cookies is actually the easiest part, and we have SO much more to get to… so let’s just get down to it.
Using a stand mixer with a paddle attachment or a hand mixer, beat the butter, sugar, and salt for 1-2 minutes, until combined but not completely smooth. Be sure to use a spatula to lift the pieces of sugar that fall to the bottom of the bowl and then beat again - we don’t want to see any loose sugar grains. You’ll know you’re there when the bottom of the bowl looks clean.

For the most part she’s a great helper…

…but she’s also a sugar theif.
Step 3: Add the Dry Ingredients (AKA Just Flour)
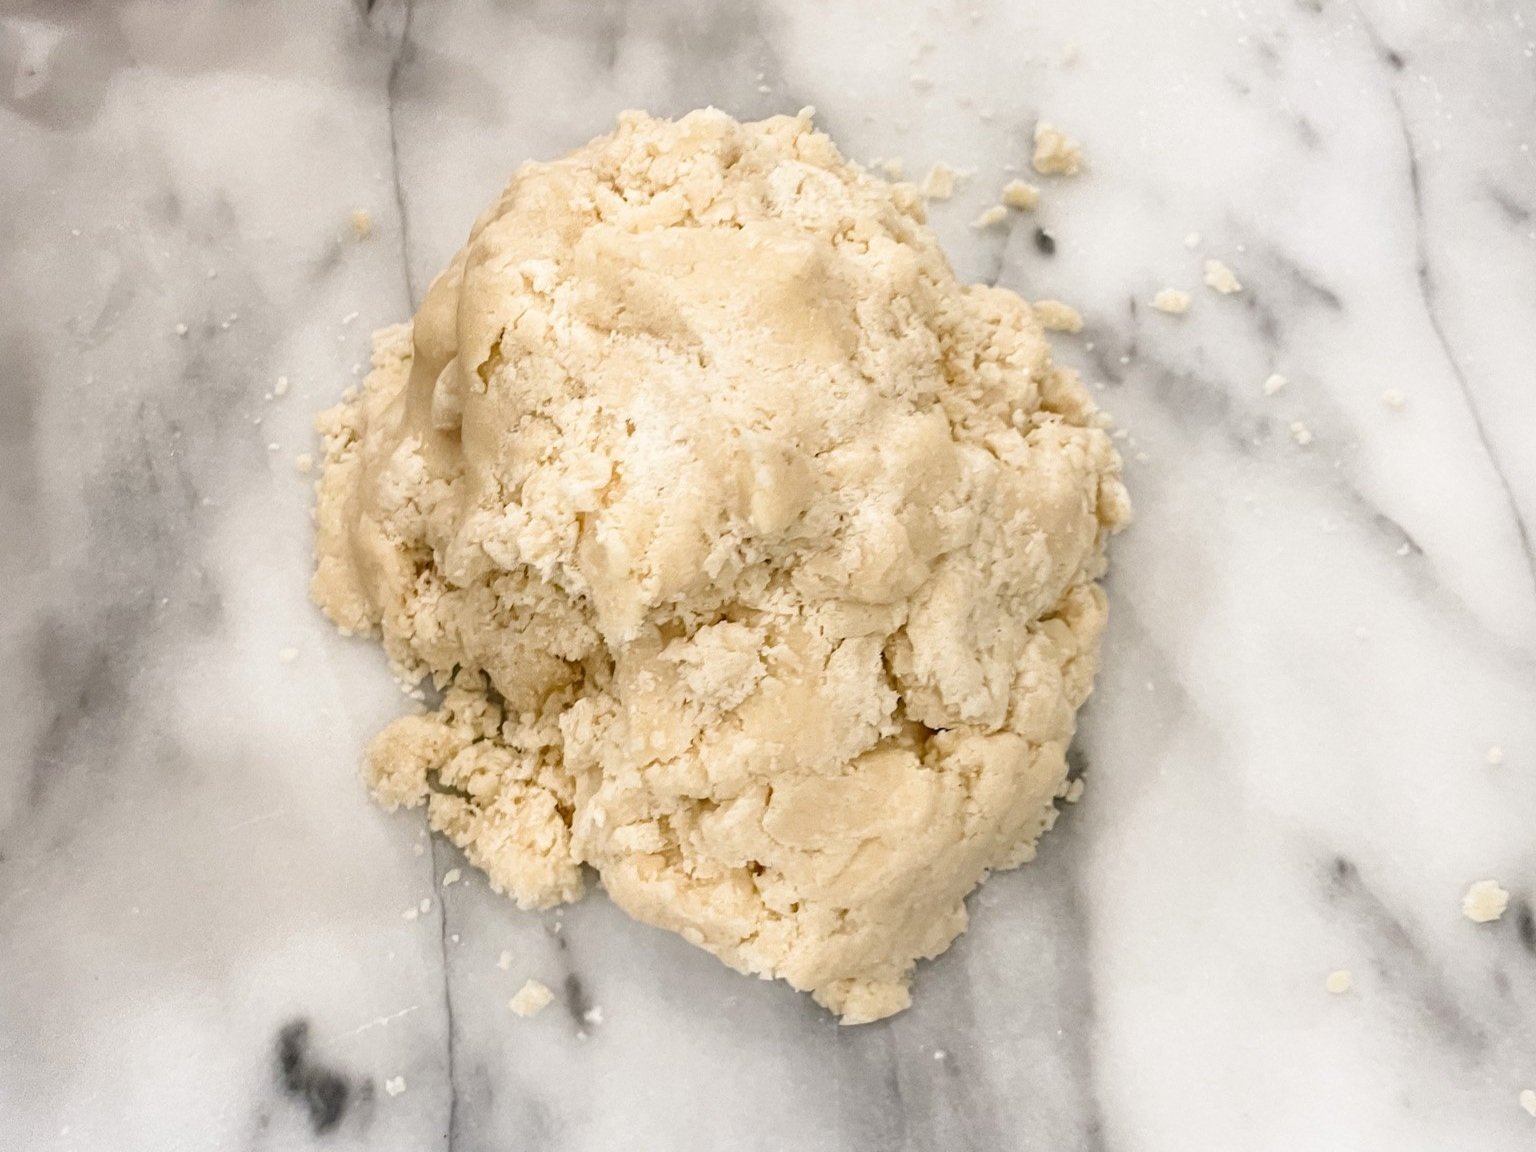
Add 1/4 to 1/3 of the flour and beat on a low speed. Use a spatula to bring any bits of flour on the bottom that the mixer blatantly ignores to the top (as with the sugar above), and then beat again. Once fully incorporated, add another 1/4 to 1/3 of the flour and repeat, until everything is fully combined. Your finished dough will look crumbly and that’s fine - this is the result of using cold butter rather than softened butter, and it’s what gives shortbread it’s signature light and flakey texture.

It’s not pretty, but it’s perfect!
Step 4: Cut Out Cookies
On a lightly floured countertop (I use a pastry slab, but that’s because I’m fancy) turn the dough out and form it into a lumpy ball. You’re going to feel like you’re herding cats because it’s nearly impossible to get every little crumble in there, so don’t sweat it. We’re not going for perfection here - good enough is good enough.
Knead your lumpy ball of dough several times, just enough to smooth out the dough, and then bring it back together. I can’t even call it a ball, it’s more like a mound, but you know what I mean.
Using a rolling pin, roll your dough out to about 1/4” thick. To keep the dough from sticking to the rolling pin, dust the top of the dough with more flour - and if it’s still sticking, dust with even more flour. Don’t worry - you won’t see this extra flour after the cookies bake. Additionally, as you roll it out your dough will start to crack. Just use your (clean) hands to mold it back together.
Lumpy ball o’ dough.

After kneading. Really you’re just bringing it back together to make it easier to roll out.

This flour will disappear into the cookies as they bake. Don’t fear the flour!
Once your dough is rolled out, you’re ready to cut out your cookies! For this you’ll need two cookie cutters, one larger than the other, and a butter knife. Using your larger cookie cutter, cut out as many cookies as you can. Then take your small cookie cutter and cut out the middle of half of the cookies.
Now comes the most perilous part of the process - transferring your cut out cookies to your baking sheet. Starting at one edge, pull the excess dough away from one of your cookies just enough to get to it. If your surface was sufficiently floured, you should be able to just pick the cookie up and gently place it on your (parchment lined) cookie sheet. However, often that flour on the bottom of the dough gets pushed around in the rolling process and your cookies will be stuck to the counter. No worries, just take your butter knife and gently slide it under your cookie to loosen it.
As you go, you’ll collect a lot of scraps, both from around the cookies and from the center of the cut-outs. Just gather them all together and roll out the dough again to cut out more cookies. Keep doing this until all of your dough is gone.
Also, these don’t spread much at all so they can be placed pretty close together. Yay for efficiency!
Bake cookies in a preheated oven on 300 for approximately 25 minutes, or until they just start to brown around the edges. These can go from uncooked to overdone quickly so don’t walk away from the oven. Mind your shortbread, my friends.
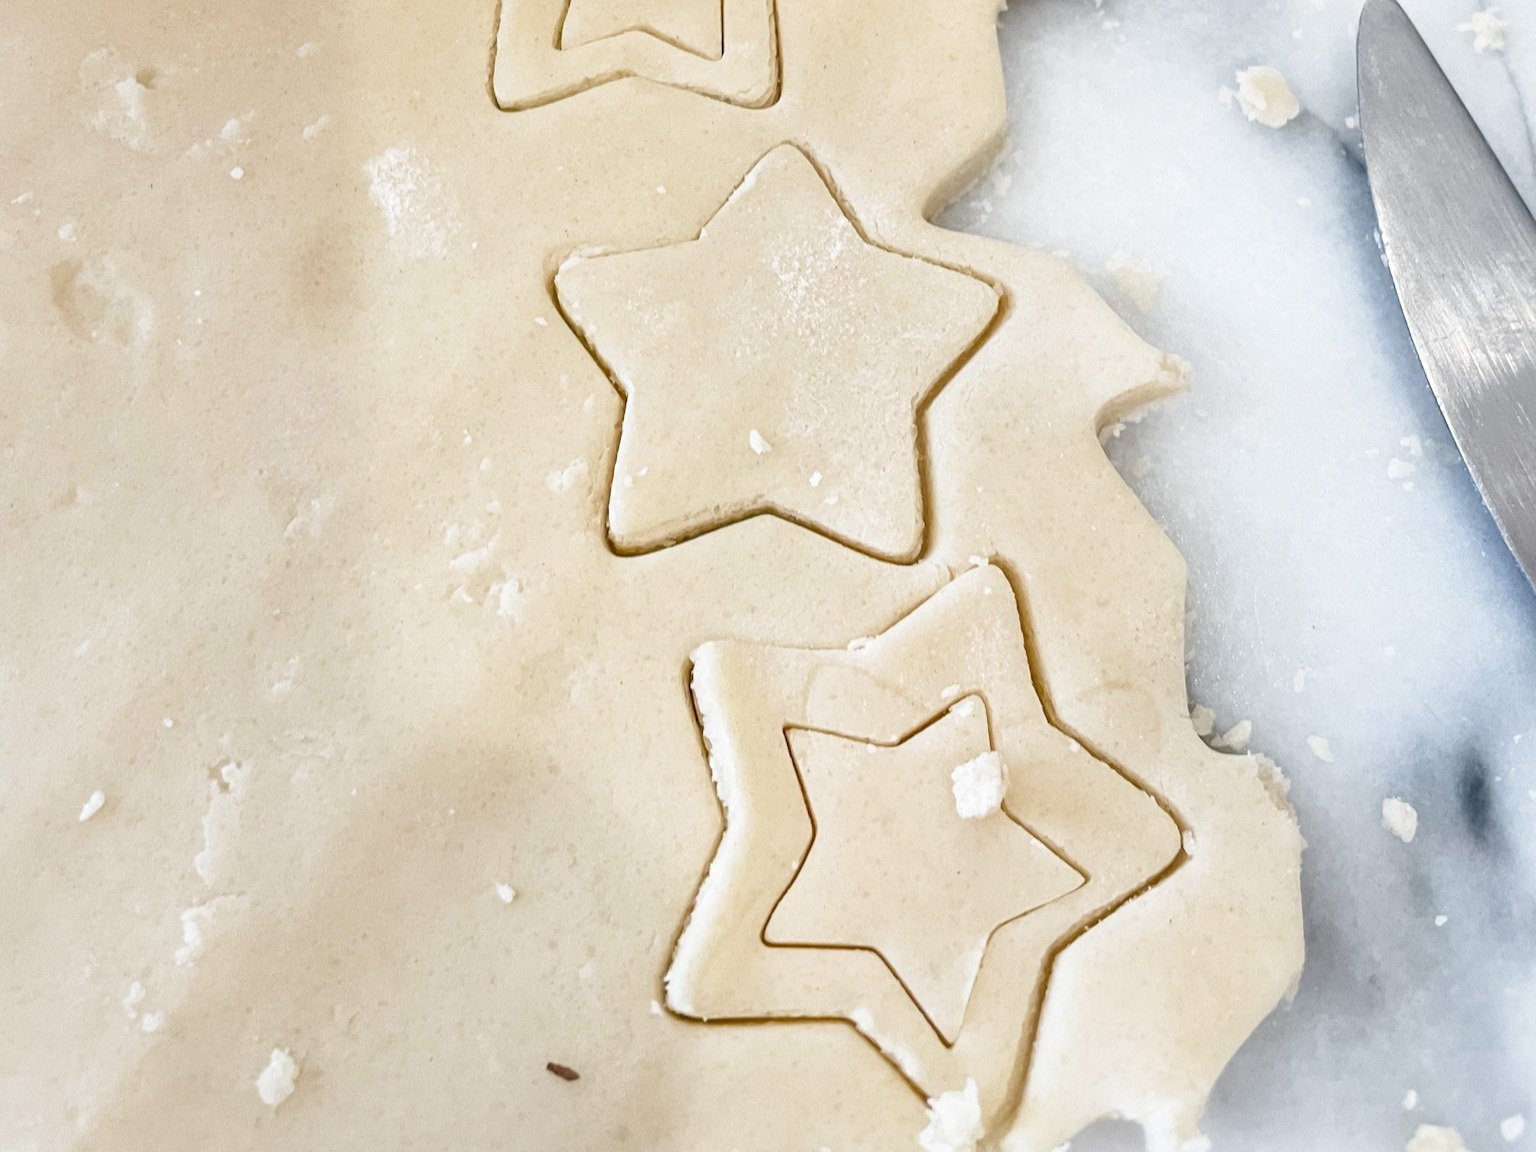
Make sure you haven’t rolled your dough out too thin, otherwise this process will be brutal.

The middles can be hard to lift out so if the whole cookie breaks in the process don’t sweat it - just roll it out again.

I suggest making more tops than bottoms, since they’re the most likely to break or look wonky coming out of the oven.
Step 5: Assemble Cookies
After taking cookies out of the oven, allow them to cool on the baking sheet. You can transfer them to a wire rack after a minute or two if you want, but it’s not necessary.
Once cool, match up your tops and bottom as best as you can. Especially the tops will have taken on all sorts of different shapes after baking, so just try to find the best match of tops and bottoms as you can. You’ll want to align your tops and bottoms back-to-back, as this will allow them to sit squarely on one another.
Place a dollop of jam on the bottom of each bottom cookie, using the back of the spoon to spread it on the entire cookie. Yes, a “dollop” is a completely valid term - the exact size will depend on the size of your cookie. Aim to cover the entire cookie in a thin layer of jam; too little and the cookies won’t stick together (and you won’t be able to taste the jam), too much and it will be oozing out the sides. Place the top on each bottom and press gently to get the two sides to stick together.

Match them up back-to-back.

This is what my “dollop” looks like. It was maybe 1/2 tsp. of jam for my little cookies.

Oh, hello, cute little cookie!
Step 5: Ice Your Cookies
To be honest, the icing was a last minute decision - I just felt like they could use a little extra sweetness. To make a very simple icing, place your powdered sugar in a bowl and add just a small splash of milk or water. For real, no more than a tablespoon. Whisk it together with a fork and look for it to become like a runny paste. If it’s not runny enough, add the TINIEST bit more milk and whisk again. But, be careful - this will go from pasty to watery (and, thus, unusable) in a hot second. Just an additional drop of milk will often do the trick.
Place icing in a pastry bag fitted with a tip and drizzle onto your cookies. Alternately, you could just use your fork and drizzle it from the prongs, which I’ve totally done in the past.
Another option is to put some more powdered sugar in a sifter and sift the powdered sugar onto your cookies. This is what I would have done if I was, say, serving them at a party rather than placing them in gift baskets. Powdered sugar tends to get everywhere in the baskets so I like to save it for only where it’s completely necessary (like these Chocolate Crinkle Cookies).

Ta da!!!!

Mission Accomplished :)
Well, there you have it. Shortbread cookies for my little shortbread :). Happy baking, my friends!